
Dummy 13 Kit Card Assembly Instructions
Follow this visual step-by-step guide to snap, assemble, and pose your fully articulated Dummy 13 action figure!
💡 Pro Tips for Easy Assembly
Assemble the dark grey inner skeleton core first. The colored armor plates snap snugly over the skeleton frame.
Gently twist each piece from the kit card runner frame. If any tiny burrs remain, smooth them with your thumbnail or flush cutters.
Pay close attention to step 15 (ankles) and step 18 (shoulders) to ensure left and right joints are oriented correctly.
Torso, Chest, Neck & Inner Core Skeleton
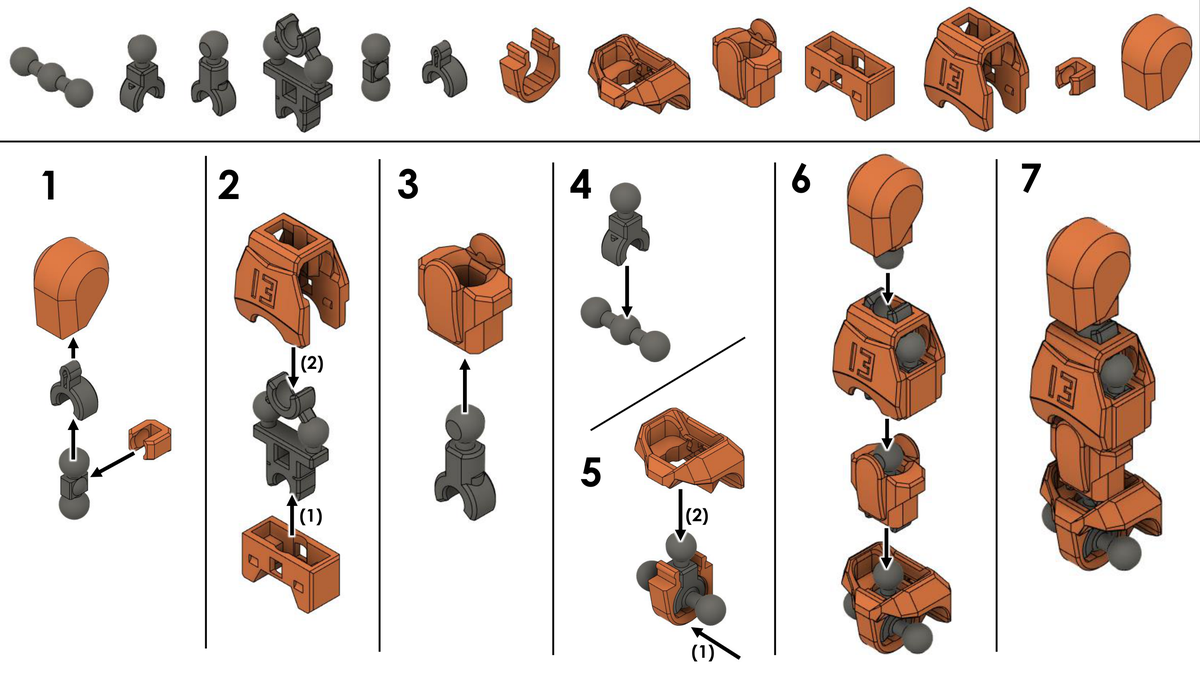
Skeleton & Chest Armor
Assemble the neck joint (1), waist connector (2), and chest armor (3). Join the central spine ball joint (4), snap into the lower abdomen (5), and connect the upper chest and head (6 & 7).
Upper Legs, Hips & Knee Joint Assembly
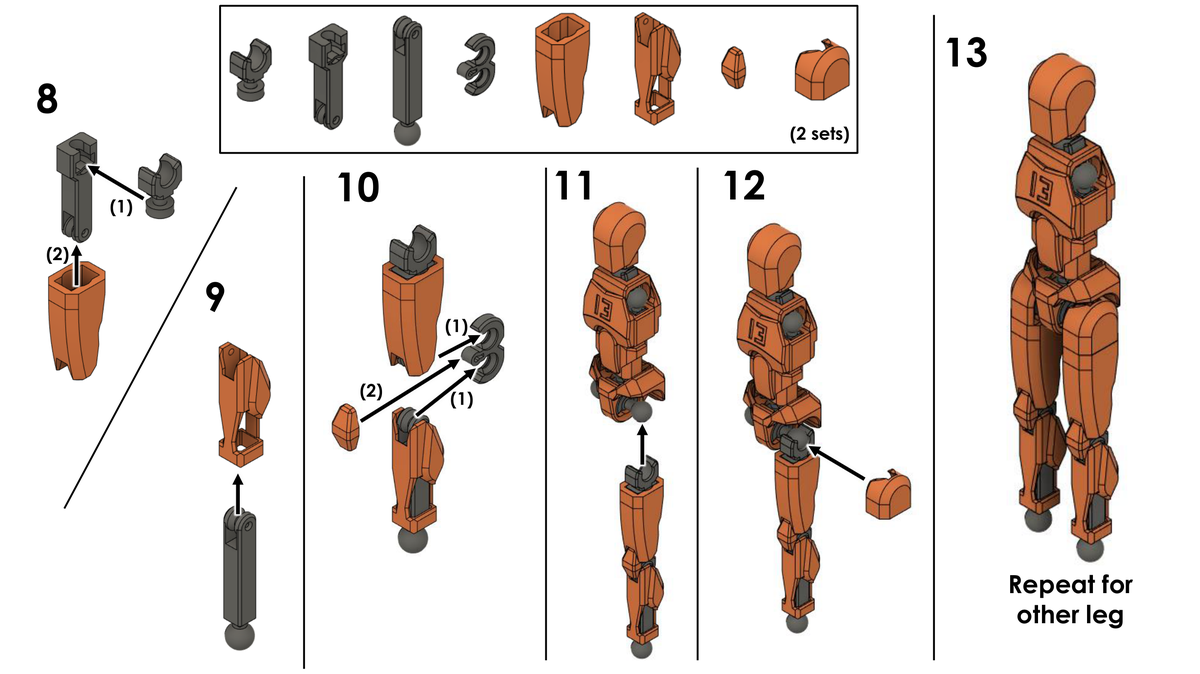
Build 2 Matching Sets
Slide the hip connector into the thigh armor (8) and lower leg joint (9). Assemble the knee hinge and armor covers (10). Snap both completed legs into the pelvis ball joints (11–13).
Feet, Symmetrical Ankles & Lower Legs
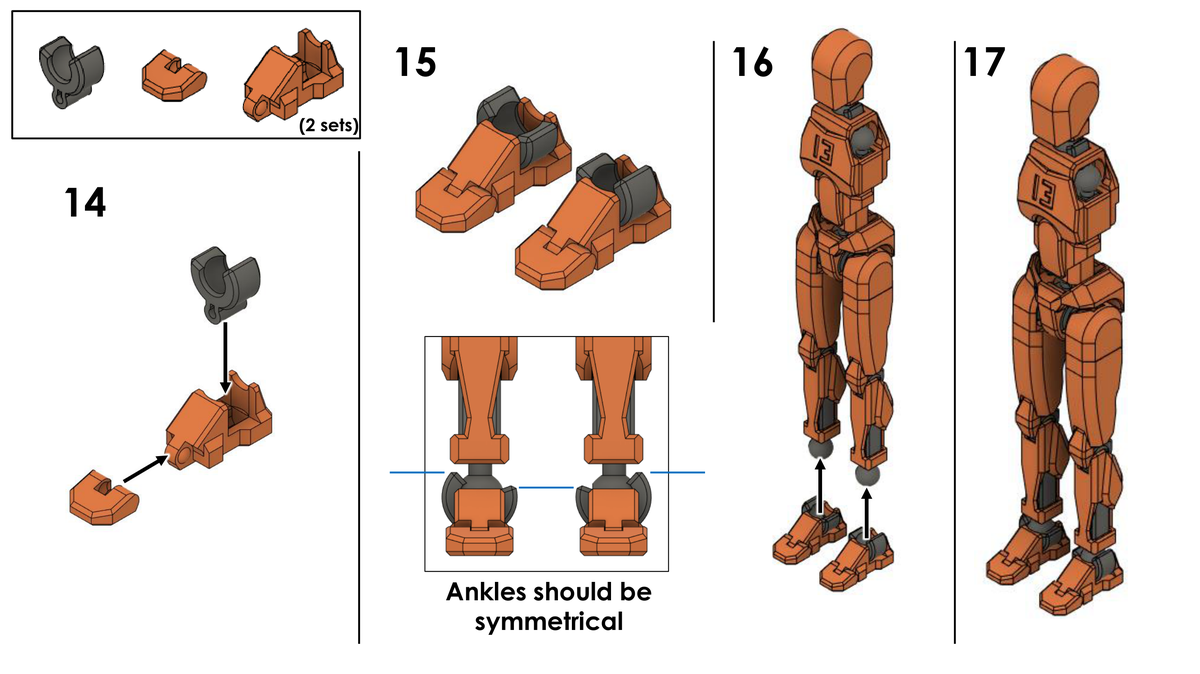
Ensure Symmetrical Ankles
Assemble the toe caps and ankle ball sockets (14 & 15). Important: Check that left and right ankles are symmetrical before snapping onto the bottom leg ball joints (16 & 17).
Shoulders, Arms, Forearms & Wrists
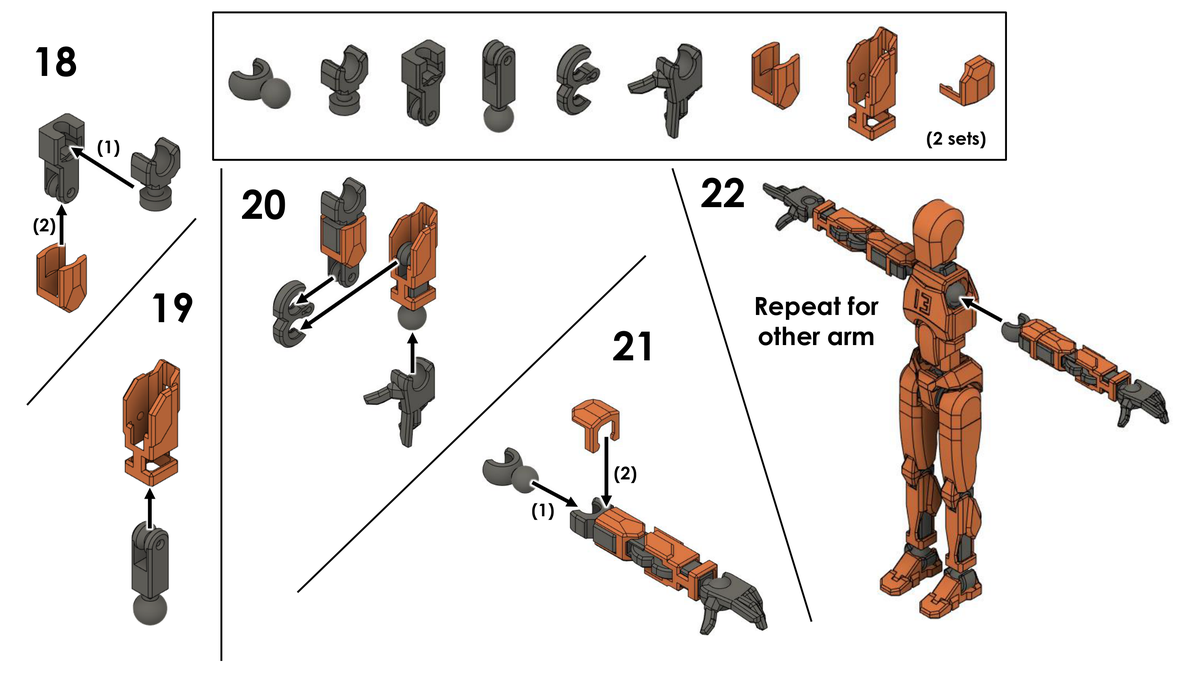
Build 2 Matching Sets
Build the shoulder hinges (18), forearm armor (19), and elbow articulation links (20 & 21). Snap both completed arm assemblies into the torso shoulder sockets (22).
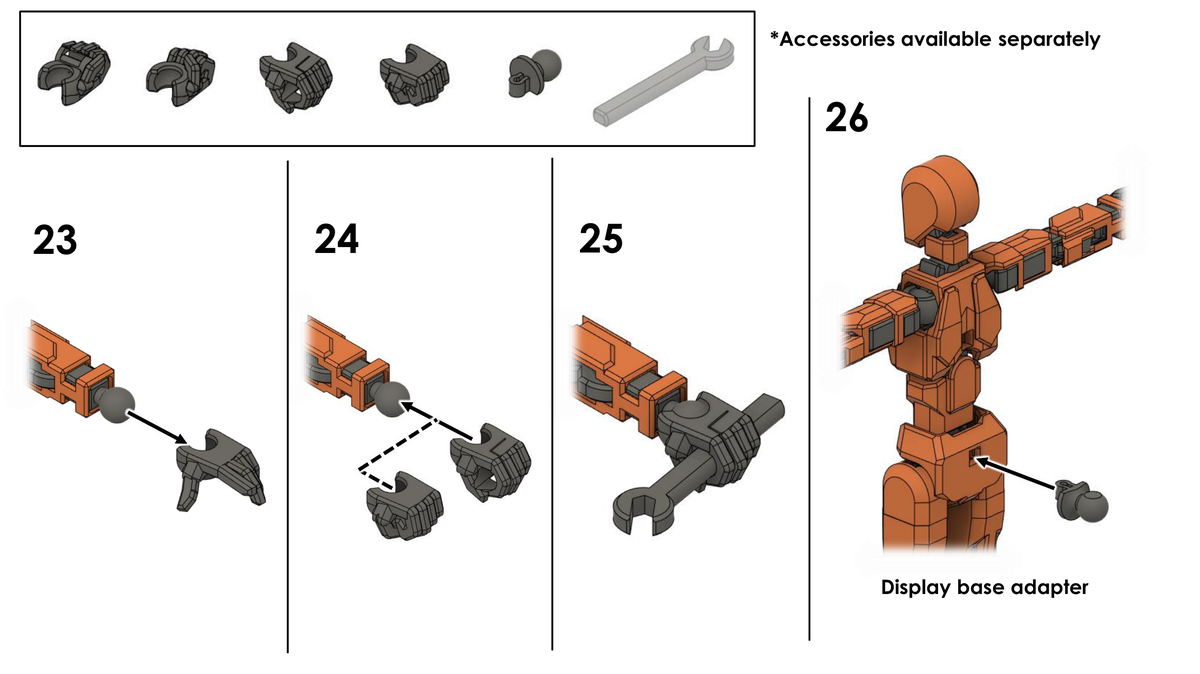
Interchangeable Hands, Weapons & Display Base Adapter
Final Customization
Snap on your choice of hands (relaxed, closed fist, or tool grip in steps 23–25). Insert the display base adapter pin (step 26) into the lower back socket to mount your figure onto stands or flying display arms.
Need More Kit Cards or Custom Colors?
Explore our 3D printed maker collection, sponsor classroom sensory kits, or order custom multi-color action figures.